Recently I was playing around with Netbackup’s cloud server integration and after reading through their manual and the related doc’s I thought that the subject could use a much simpler explanation and perhaps a walk-through.
So far from what I have seen the Netbackup Cloud Storage Server seems to work quite well. The setup wizard is relatively straight-forward and I was definitely impressed with how quickly data was backed up to S3. Basically, after everything is all said and done, backing up to S3 should behave pretty much the same way as backing up to a local tape or disk.
That being said, my only complaints with the system is the licensing and the lack of Glacier support. You will want to go through the details with your own licensing rep’s but I was told that the product is licensed based upon how many TB’s you would like to hold in the cloud. Since Netbackup is only providing a gateway to S3 I dont see why I should pay Symantec a per TB fee…
Anyways, on to the walk-through:
IAM Initial Account Creation
To begin, we are going to create an account for NetBackup to use with S3 by using Amazon Identity and Access Management (IAM). This allows you to create as many accounts as you need under your main AWS account. The accounts can be used for services, API’s or as separate logins to the web site.
The account we are creating will initially have access to all S3 buckets, but after we are done setting up NetBackup we are going to limit it to a single S3 bucket by using IAM policies and groups.
To start, login to the AWS console and select IAM. Then click on Users and finally on “Create new users.” You should get a screen that is similar to this (If it hasnt been updated):
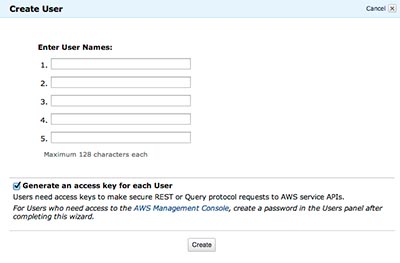
Make sure the “Generate an access key for each User” box is checked as we will need this information to connect Netbackup to AWS (although it can be generated later if needed).
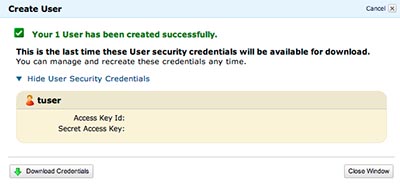
Once you click create, you should get a screen that looks like the one below (You may need to expand the user credentials view). Make sure to write it down or click “Download Credentials” as this is what we will need to connect Netbackup to S3.
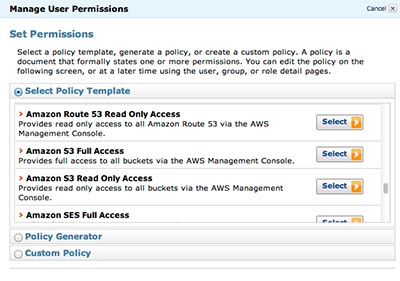
Once you are back on the main IAM Users screen, check the box next to the user you just created and in the lower box choose “Permissions” and “Attach User Policy.” This should give you the screen below.
Choose “Select” next to “Amazon S3 Full Access” and then choose “Apply Policy.”
Please note, this is going to give full access to all S3 buckets under your account to this account. I am providing instructions towards the end of this article on how to restrict this.
Your account should now be ready for us to setup Netbackup.
Netbackup Configuration
To configure Netbackup, start the Netbackup Java console (you may need to install) and select your master server’s name at the top left of the tree view. This should show some options such as Getting Started, Configure Storage Devices and Configure Cloud Storage Server in the right hand pane.
Note – These instructions show how to do this using the Java Console and not the regular Administrator Console
Click “Cloud Storage Server” to start the wizard. Then click Next, choose your storage provider (Amazon) and click Next.
Here you will need the Access Key Id and Secret Access Key that you wrote down or saved earlier when creating your IAM Amazon account. Input the Access Key ID into Access ID and input the Secret Access Key into the Secure Access key field and choose next.
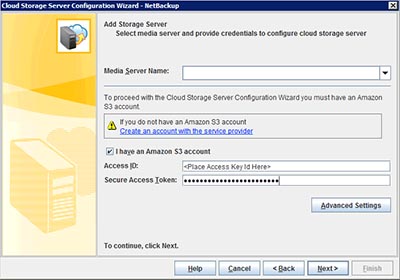
On the following screen you are given the opportunity to create a Key Management Server in Netbackup if not already created. The KMS manages cryptography keys for your backup devices.
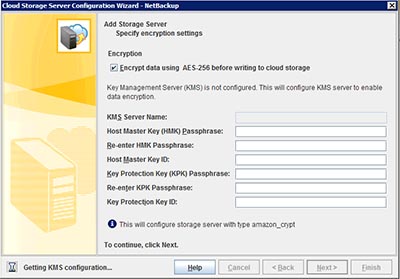
Once you click through the summary screen Netbackup will configure your settings for S3. Please note, if you do not have the appropriate license you may get an authentication failure. If this happens, you can troubleshoot this and see the real failure message by creating the debug log tpcommand under volmgr (/usr/openv/volmgr/debug/tpcommand).
After configuration has completed click “Next” to start the Disk Pool configuration.
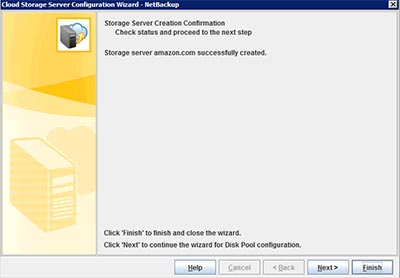
Creating the buckets
In the following disk pool configuration screens we are going to create the buckets to store our data. If you accidentally clicked Finish in the previous screen, you can start this wizard by clicking on Media and Device Management -> Devices and then choosing Actions -> New -> Disk Pool. Otherwise if you just clicked Next previously you should already be in the wizard.
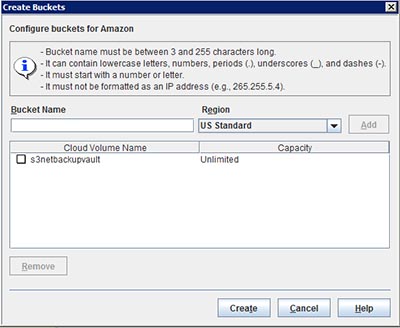
In the wizard click Next, choose Cloud Storage, click Next again and choose your storage provider, clicking next again. Finally on the Select Volumes screen choose Add New Volume to get the screen below.
Here you can create a bucket for your backup by typing a name in the Bucket Name field and choose Add. Please keep in mind that S3 bucket names need to be globally unique and cannot be a name that any other S3 user has used.
Once you have finished with your buckets click Create.
After coming back to the Select Volumes screen you will see any buckets you have available. Check the bucket you wish to configure and click Next to create a key record to handle the encryption on your volume(s).
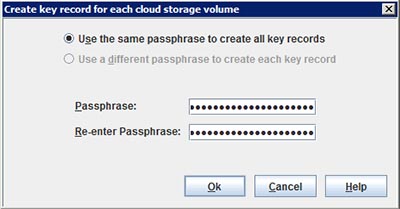
Once you are done you can name the Disk Pool and click Next, Next to create it.
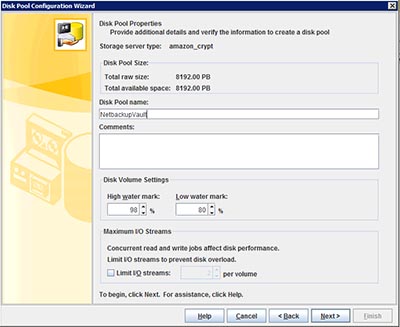
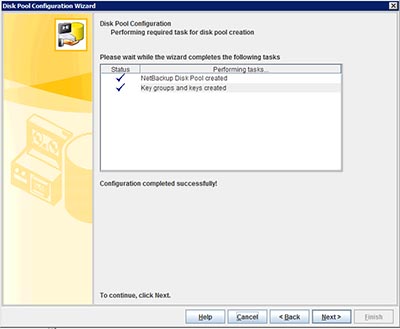
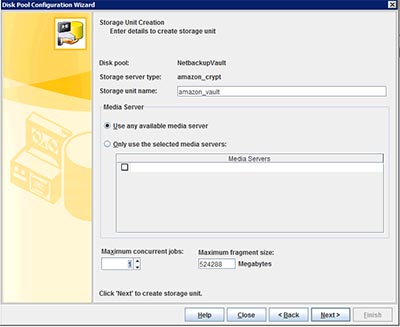
Lastly, clicking Next will bring you to the storage unit configuration. Here you will need to create your storage unit that can be tied into backup jobs and once you are done, you should be all set on the Netbackup side.
Locking down your buckets
Since S3 in your organization is probably used for more than just backups I find it is a good idea to lock down the account we created earlier to just the buckets that it needs access to.
For this example we are going to create a policy with access to only the buckets required by Netbackup, apply the policy to a group in order to make things easy to understand and then apply the group to the Netbackup user we created earlier.
Policy
First lets create the policy and group by logging into the AWS console and choosing IAM and then selecting Groups from the left hand side. Once in the Group screen choose Create New Group, name the group something descriptive and click Continue.
On the next screen choose Custom Policy and click Select to open the policy editor screen below.
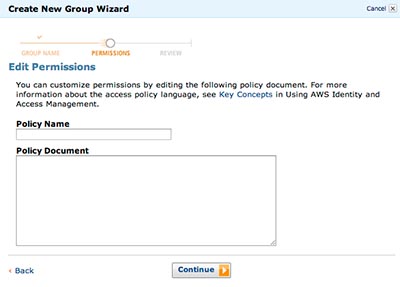
In this screen name the policy something descriptive (Such as NetbackupS3Policy) and then edit the permissions script below before pasting it into your Policy Document.
The policy below consists of two permissions. First we are allowing the permission to list all S3 buckets as the account will need this permission to see the names of existing buckets and secondly we are giving all s3 access (s3*) to the bucket s3netbackupvault and s3netbackupvault/* (all of its subdirectories).
To edit the script you will need to update the s3netbackupvault bucket name to the bucket you created.
After you are done, click Continue and finally Create Group.
{
"Statement": [
{
"Sid": "s3listallbuckets",
"Action": [
"s3:ListAllMyBuckets"
],
"Effect": "Allow",
"Resource": [
"arn:aws:s3:::*"
]
},
{
"Sid": "s3accesssinglebucket",
"Action": [
"s3:*"
],
"Effect": "Allow",
"Resource": [
"arn:aws:s3:::s3netbackupvault",
"arn:aws:s3:::s3netbackupvault/*"
]
}
]
}
Updating the user
Now lets go back and restrict the users permissions by first clicking on Users in the left hand side, choose the Netbackup user we created earlier and then choose Add User to Group. Choose the group we created in the previous step and choose Add to Groups.
At this point the user has the restricted permissions but they also have the policy that we originally applied to the user in the beginning of this article giving the user full permissions to S3. To remove this policy click on Permissions and choose Remove this Policy next to AmazonS3FullAccess under User Policies.


Hi
Im trying this with netbackup enterprise on windows 2008 r2 Ent. Version is 7.6.0.3.
This is failing. Through the Cloud Storage Wizard, once you create the bucket, the bucket isn’t listed in the wizard, and therefore you cannot go on to create the disk pool. I can’t find the doc online again, but it said in previous versions you could only create buckets in the USA regions. With this and newer versions, you can use other AWS regions.
What version of netbackup are you using for this? And what region did you create your bucket in?
thanks
Hi, sorry for the late reply it has been a crazy year. I was using Netbackup 7.5 but I changed jobs and have since switched everything to VEEAM so I havent been using it much lately.
Looks like the Amazon UI has changed significantly since this article came out. Could you update it?
As for the licensing, you misunderstood. It’s per TB of data protected, not the volume of data in your backup repository (be that tape, disk, dedupe or cloud). 10 servers with 0.5TB of data each would require a 5TB license. That covers everything – master server, media servers, clients, application DB agents, dedupe, encryption, cloud storage, virtual machine protection, instant recovery, backup replication, lifecycle policies, ops center, etc, etc…